We love legumes. They’re economical and a great source of protein, iron and fiber. There is one problem though. Gas! That’s why it’s imperative to cook them properly, which really helps prevent or lessen digestive issues. When you cook your own beans you can control the process, and you might find that you have fewer problems than when you eat canned beans (depending on the brand and how they are prepared).
Legumes are a class of food that includes all types of beans, peas, lentils and peanuts. To simplify matters, we’ll just refer to all legumes as beans here.
Beans are a great food for the budget and health conscious person. As we already mentioned, they supply protein and high levels of fiber and iron. They are also good sources of many other minerals, B vitamins, and numerous antioxidant and anti-inflammatory phytonutrients. Beans have been shown to help regulate blood sugar levels and prevent risk factors for type 2 diabetes, reduce risk of cardiovascular disease, and support good digestive health by aiding in elimination and feeding good bacteria. Dried beans are the most economical form, but canned beans are still inexpensive. When reading a recipe, pay attention to what type is required—dried beans or cooked beans. If you want to cook your own beans to use in place of canned beans, here are some useful conversions:
One pound of dried beans is about 2-1/4 to 2-1/2 cups dried beans = about 5 ½ cups cooked beans
1 (14 to 16-ounce) can of beans = 1-1/2 to 2 cups cooked beans (depending on how much water is in the can)
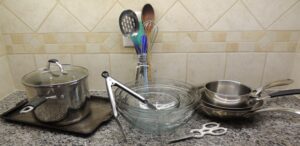
If you choose to save money and cook dried beans, here are the basic instructions and other tips:
- Sort. Spread out beans on a flat surface so you can remove any small pebbles or shriveled up beans. Rinse beans before soaking.
- Soak. There are 2 primary techniques for soaking dried beans:
Note: This doesn’t apply to peas and lentils. See #4 Exceptions.
- Overnight soaking method: Place beans in a pot and add about 4 cups of water for every 1 cup of beans, or just cover with about 3 inches of water on top of the beans. It doesn’t have to be exact, but it’s always better to have too much water here than not enough. Cover and let stand overnight or for at least 8 hours and up to 24 hours, preferably in the refrigerator.
- Quick-soak: Place beans in a pot and add about 4 cups of water for every 1 cup of beans, or just cover with about 3 inches of water on top of the beans. Bring water to a full boil and cook uncovered for a few minutes. Remove from heat, cover with the lid, and let stand for 1-4 hours.
- Cook. Drain the soaked beans, place in a large pot, then add 3-4 cups of water for each cup of dried beans you soaked, depending on how much juice you like. If you add a little oil (about 1/2 tablespoon) the beans will not foam up and boil over as easily. Herbs, garlic cloves and onions can also be added if desired, but not salt, unless you’ve brined the beans, another technique we’ll discuss later. Bring to a gentle boil for about 10 minutes to break down the lectins, which are toxins found in beans that are difficult to digest. Turn heat down to a simmer and continue cooking until beans are soft. The amount of time varies depending on the bean. It could take several hours. Add more hot water if needed, so beans remain fully covered in water.
- Exceptions. Lentils and peas do not need to be soaked because they have fewer lectins. Just sort, rinse, then cover with about 1 inch of water. Bring to a boil for a few minutes, then turn down and simmer, adding more hot water if needed. As with other beans, you can add oil or herbs now, but no salt or acidic ingredients. These legumes only need to cook about 20-30 minutes.
- Additions. We’ve said it before and we’ll say it again. Never add salt to beans until they are soft, unless you’ve brined them first. Also never add anything acidic to beans until they are soft, period. If you do add salt or acidic ingredients too early the beans will not get soft no matter how long you cook them. Add salt and/or acidic ingredients after the beans are already soft. This includes garlic salt and onion salt, any spice blends that contain salt, broth that is salted, tomatoes in any form, vinegar, wine, lemon juice, and chili sauce. You can add fresh peppers, but not any that are canned or jarred with added citric acid.
- Brining beans. This technique also works well and some people prefer it. For every pound of beans, presoak in a brine (salted water) of 8 cups water and 1-1/2 tablespoons salt. Soak overnight or up to 24 hours. Brined beans must then be cooked in salted water. Drain and rinse. Cook in 8 cups water and 1 teaspoon salt, following the same directions as previously described. Bottom line: soak and cook with salt, or soak and cook without salt.
- Combining Beans. Different types and sizes of dried beans require different cooking times, so it’s best to avoid mixing them unless they have already been cooked separately. There are bean mixes for 7-bean or 10-bean soups, etc. out there and many people love them. We just find that some smaller beans disintegrate while others don’t get soft enough, when all cooked together. That may or may not bother you.
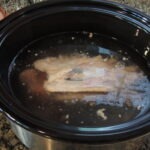
- Don’t be afraid. Cooking dried beans is really easy! It just takes planning ahead and being around to check on them. You can also cook beans in a slow cooker. Follow the directions that came with the cooker or the directions in many of our bean recipes, like Nana’s Pinto Beans, Slow Cooked Black Beans, and Cajun Beans and Rice.