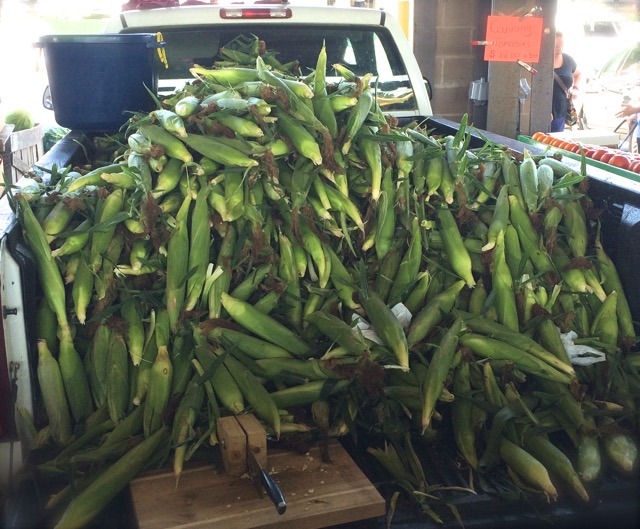
We know summer is in full swing when truckloads of corn appear in the farmers market and at the grocery stores. We may not like the heat, but we sure look forward to eating golden sweet ears of corn, dripping with butter.
But, we have a confession to make. We used to cook corn on the cob with no eye on the timer. Sometimes it was delicious, but far too often it was mushy. (You know the feeling–corn kernels stuck to your teeth and a desperate search for toothpicks!)
We always blamed the corn, but one day we decided to step out of denial and accept responsibility for simply cooking the corn too long. We needed to figure out how to properly cook corn on the cob so it would turn out crisp-tender every time, which led us to research all the different ways to cook corn on the cob. Now, we’re ready to share what we learned.
First, be sure to buy fresh corn, in the husk. The leaves should be green and not dried out, fitting tightly to the cob.
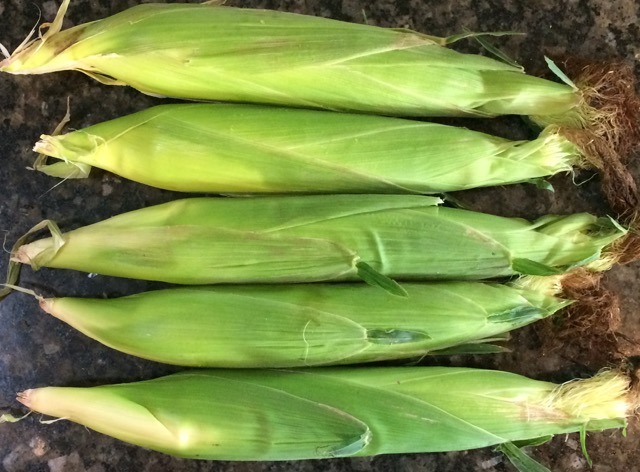
If you trust the vendor, don’t pull them back to check the quality. However, if you can’t resist checking, pull a small piece just enough to see the end. That’s usually a good enough indication of the whole ear. Corn on the cob begins to lose freshness and flavor after the husk is peeled away or removed, so it’s also wise to shuck them at home right before cooking them. Be sure to add the corn husks to your compost pile, unless you like to make tamales with them!
Before you start shucking away, decide if you want to cook them in the husk or not. Below are the 4 different ways we like to cook our corn on the cob, with options for keeping or removing the husks.
| Prep Time | |
| 2-5 minutes |
| Cook Time | Passive Time |
| 3 minutes | 5-10 minutes |
|
|

Easy!
Inexpensive!
Serves:1person
Serving Size:1 ear of corn
|
Traditional, boiled corn on the cob is easy to do, but it does require extra time to boil the water. If you’re using a 4-quart saucepan, you might need to shuck the corn and break the ears in half so they’ll fit. If you have a larger saucepan, definitely use it. You can cook the corn in the husk or with the husk removed, whichever you prefer. It’s less messy to shuck the corn before you boil it, but more nutrients will be preserved if you leave it in the husk. An added benefit of the latter is that the corn will stay nice and warm in its husk until ready to serve.
Tools:large (4-quart, or larger) saucepan
|
- Fill a large saucepan with about half full of water.* Cover and turn heat to high. It will take about 5 to 10 minutes to come to a boil, depending on the size of the pan, the amount of water, and the type of stovetop (gas, electric, or induction).
- Shuck the corn if desired. a) To shuck: Remove husk and silk. Cut off stalk and any bad spots. b) To leave in husk: If desired, peel husk back just a few inches and remove as much of the corn silk as possible. Smooth husk back into place. This is optional.
- Once the water comes to a rolling boil, lower the corn into the pot. Cover and immediately set the timer for 3 minutes. If cooking more than 4 ears of corn, add 1 minute.
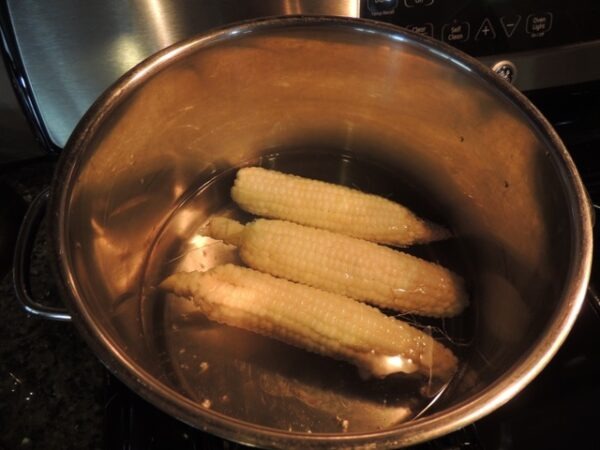
- As soon as the timer goes off, remove corn from the water. It will be crisp and ready to eat. If unshucked, cool a few minutes before removing the husk and silk. NOTE: It will continue to cook somewhat as it stands.
* Chef’s Tip:
Do not add anything to the water. Salt causes the corn to dry out. Sugar does nothing and is unnecessary.
SERVING SUGGESTIONS:
- Roll in butter.
- Soften some butter, then stir in your favorite herbs or spices. Try rosemary, fresh chives or tarragon, basil, nutmeg, chili powder, or smoked paprika. Chill and serve on the side, or place a dollop on the corn.
- Squeeze lime juice over the corn and sprinkle with salt and pepper. Add smoked paprika or chili powder if desired.
| Prep Time | |
| 5 minutes |
| Cook Time |
| 15 minutes |
|
|

Easy!
Inexpensive!
Serves:1
Serving Size:1 ear of corn
|
If we're having a cookout, we like to grill our corn on the cob. There are numerous techniques, but this is how we do it.
Tools:grill, pastry brush (optional), cooling twine (optional)
|
- 1 ear corn in husk
- 1/2 tablespoon butter (melted or softened)
- Salt and pepper
- fresh herbs (e.g., sage, rosemary, thyme, rosemary...)
- Heat grill to medium-high, or according to your meat recipe if cooking both at the same time.
- Peel back the husks, but leave it attached at the base. Remove corn silk.
- Brush or rub corn with butter, then sprinkle with salt and pepper. Add sprigs of herbs if desired.
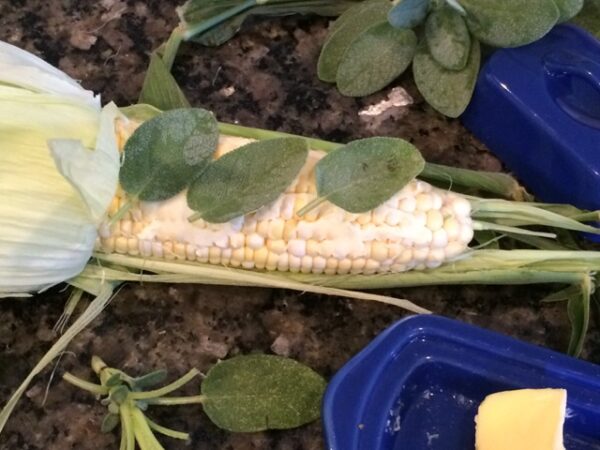
- Bring the husks back to the original position and tie the end with some cooking twine. You might want to tie around the middle as well.
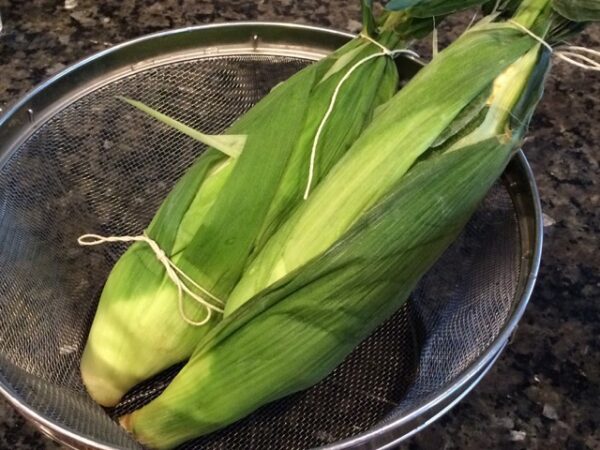
- Place on grill and cook about 15 minutes, turning over halfway through. The husks will get brown.
- Cool slightly before peeling back the husks.
| Prep Time | |
| 2-5 minutes |
| Cook Time |
| 20-60 minutes |
|
|

Easy!
Inexpensive
Serves:1person
Serving Size:1 ear of corn
|
If you don't have access to a grill, you can get a similar look and flavor by roasting corn on the cob in your oven. You can also create a crunchy corn on the cob, which is great for snacking. We prepare the corn in the same way as we do for the grill, but without any added butter, spices, or herbs, to avoid messes in the oven.
Tools:oven
|
- Preheat oven to 450 °F.
- Shuck corn if desired. a) To shuck, remove husk and silk. Cut off stalk and any bad spots. Wrap in aluminum foil. b) To leave in husk, peel it back just a few inches and remove as much of the corn silk as possible. Smooth husks back into place. Tie the end with some kitchen twine if desired.
- Place corn directly onto an oven rack positioned in the center of the oven, and roast 20 minutes for crisp-tender corn. If unshucked, cool a few minutes before shucking. If desired, pull back the husks but leave them attached (like a tail) for a fun presentation. Otherwise, remove husk completely.
SERVING SUGGESTIONS:
- Eat plain, or simply roll in butter.
- Soften some butter, then stir in your favorite herbs or spices. Try rosemary, fresh chives or tarragon, basil, nutmeg, chili powder, or smoked paprika. Chill and serve on the side, or place a dollop on the corn.
- Squeeze lime juice over the corn and sprinkle with salt and pepper. Add smoked paprika or chili powder if desired.
VARIATION:
- For a crunchy corn snack, remove husk or unwrap foil after the first 20 minutes of cooking, and roast an additional 20 to 40 minutes, to taste.
| Prep Time | |
| 1 minute |
| Cook Time |
| 4 minutes |
|
|

Easy!
Inexpensive!
Serves:1person
Serving Size:1 ear of corn
|
This has to be the quickest and easiest way to cook corn, and it usually turns out very well. Be sure to turn the corn halfway through, as indicated in the instructions, and allow it to stand at least a few minutes
Tools:microwave
|
- Place corn in the microwave, still in the husk. If preparing more than one ear, do a maximum of two at a time, and make sure there’s plenty of room between the cobs to ensure that they will cook evenly.
- Microwave on high for 2 minutes. Turn over and cook another 2 minutes on high. Let stand a few minutes then carefully peel back the top few inches of the husk to check for doneness.
- Be sure to cool before shucking or you’ll burn yourself!
SERVING SUGGESTIONS:
- Roll in butter.
- Soften some butter, then stir in your favorite herbs or spices. Try rosemary, fresh chives or tarragon, basil, nutmeg, chili powder, or smoked paprika. Chill and serve on the side, or place a dollop on the corn.
- Squeeze lime juice over the corn and sprinkle with salt and pepper. Add smoked paprika or chili powder if desired.
