This was a great challenge for the finite foodie’s limited baking resources. Since you probably don’t own a pastry blender (and might not even know what it is), a rolling pin or even a pie pan, we wanted to find a way you could still impress your family and friends with a homemade pie. NOTE: Cutting butter into flour is a technique you will also need for making biscuits.
We’ll show you:
- How to cut butter into flour without the benefit of a pastry blender, and what a pastry blender is in the first place!
- How to roll out the dough without a rolling pin.
- How to form a pie on a baking sheet.
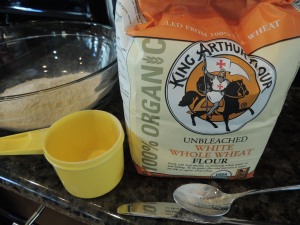
Before we go any further, remember that we try to use the most wholesome ingredients we can. For this crust we used 100% white whole wheat flour. What is that, you ask? It’s a type of wheat that’s light in color. The flour is still made from the whole grain, but it’s just not as dark as the regular red wheat we are more familiar with in the US. It has a milder flavor too, so the taste is not quite as strong as the other whole wheat flours available. Want to learn more? Read What is White Whole Wheat Flour, Anyway?
Next, we used butter (preferably organic) for the fat in the crust. We try to avoid shortening, which is a hydrogenated trans-fat, the type that is linked to heart disease, strokes and diabetes. Shortening may help the pie crust turn out light and flaky, but butter tastes much better and is a natural product that’s been eaten by humans for thousands of years. You could use coconut oil, but since it’s expensive and hard for some people to find, we normally chose butter. Pies are not a food we recommend eating very often, but if you do, use the most healthful ingredients you can. (Who doesn’t enjoy apple pies in the fall and pumpkin pies at Thanksgiving?)
How to Make Pie Crust by Hand:
Combine 1-1/2 cups white whole wheat flour, 1/4 teaspoon salt and 1 teaspoon granulated sugar in a large bowl. (Of course, you can use refined white flour for all or part of the flour, but the nutritional value will be reduced.)
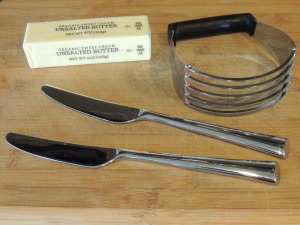
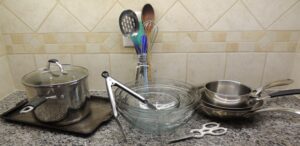
Use 1 (4-ounce) stick of butter. If you have a pastry cutter (the funny looking gadget below that is not butter or a knife), good for you! If not, take out two dinner knives.
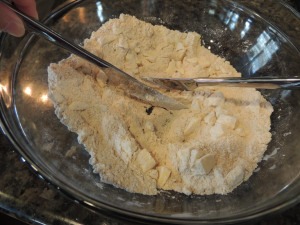
With one knife, cut butter into small slices (whether you have a pastry blender or not) and add to your flour mixture. Next, hold a knife in each hand and cut across the butter pulling the knives outward as you do. (Alternatively, use a pastry blender for this step.)
Use your fingers to crumble up the pieces of butter further if desired. However, don’t overwork the dough, or it will be tough. This should all be done quickly while butter is still cold.
As soon as butter is in small pea-size pieces, add 1/4 cup ice cold water, then use your hands to mix in the water and form into a ball.
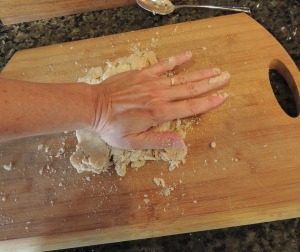
Place on a cutting board with a little flour and knead* with the heel of your hand:
*Knead – to work dough into a uniform mixture by pressing, folding and sometimes stretching with your hands, similar to giving a massage.
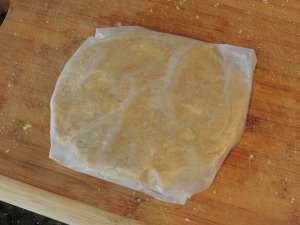
Press into a 6-inch circle, then wrap in wax paper and refrigerate until ready to make the pie, at least 30 minutes.
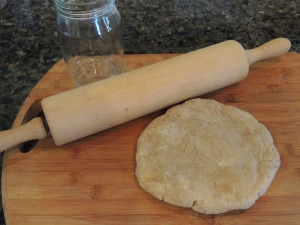
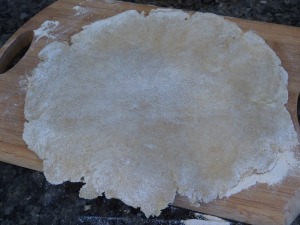
Now it’s time to roll out your dough, but wait! How do you do it without a rolling pin? Find a nice sturdy jar or wine bottle. Be careful not to break it! Spread some flour onto a cutting board. a clean kitchen counter top or even a piece of wax paper on the counter. A wooden cutting board is my favorite.
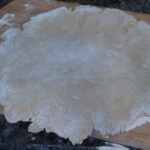
Start rolling from the center, out to the edges, until it’s about a 12-inch diameter circle and about 1/8-inch thick. Be sure to flip it over a few times, as you roll it out. It doesn’t have to be pretty.
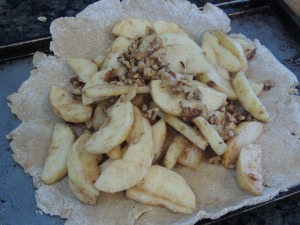
Transfer it to a baking sheet. Fill with your favorite fruit, leaving about 2 inches of uncovered crust on the edges:
Finally, turn up the edges and seal the folds, to keep the juices from leaking out. Bake according to your recipe and enjoy a rustic pie, made by hand without any special baking tools! See our recipe for this delicious Rustic Apple Pie.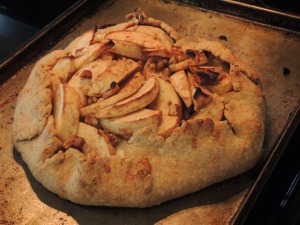
| Prep Time | |
| 20 minutes |
| Passive Time |
| 35 minutes |
|
|

Moderate
Inexpensive!
Serves:8people
Serving Size:1/8 of a pie
|
We are going into detail here, for those of you who have never made pie crust. It’s really quick and easy, once you get the hang of it. In fact, the quicker you are with the dough, the better it will be! So, don’t let the lengthy steps deter you. Of course, you can buy frozen pie crust dough or the formed pie crusts in the grocery stores, but they usually have chemical stabilizers, hydrogenated fats and other undesirable ingredients. Plus, making your own pie from scratch will give you an amazing sense of accomplishment!
Tools:large bowl, measuring cups and spoons, pastry blender or 2 knives, large wooden cutting board (optional), rolling pin or jar/bottle, baking sheet
|
- Measure the flour by using a spoon to fluff up the flour first. Then, scoop flour into your measuring cups until it is mounded up. Run the back (straight) edge of a dinner knife across the top of the cup to push away and level the flour. Pour into a large bowl and add the sugar and salt. Stir.
- Take your butter out of the refrigerator at this point (you want it to be chilled) and place in the bowl. Use your dinner knife to cut the butter into 1/4-inch thick slices.
- Using 2 dinner knives* or a pastry blender, cut the butter into the flour until the butter is in small pieces about the size of peas.
- Add 1/4 cup ice cold water to the flour mixture. Pour some water over ice and let it stand on the counter while cutting in the butter. Then, pour 1/4 cup from that glass into a measuring cup and use immediately.
- Using a fork and your hands, quickly mix the dough so it starts to stick together, for the most part. It’s fine if it’s still somewhat crumbly, but try to form most of it into a ball.
- Dump the mixture onto a work surface, like a cutting board, granite or marble counter, wax paper, or if you have one, a non-slip pastry mat. Gather up all the dough and start kneading it with the heel of your hand, but only a few times. Do not over work the dough, or it will be tough.
- Form into a ball again and use the heel of your hand to press it flat until it’s about 6-inches in diameter. Wrap in waxed paper and place in the refrigerator for 30-60 minutes, until you’re ready to roll it out. If you want to make it the day before or if you want to freeze it, then place the wrapped dough into a baggie or wrap in plastic wrap. We usually use wax paper with plastic over it, to prevent any leaching of plastic chemicals into the dough.
- To roll out, place about 1 tablespoon of flour onto the surface you’re planning to use (cutting board, granite or marble counter, wax paper, or if you have one, a non-slip pastry mat) and spread it out into a 12-inch circle. Unwrap the dough and place it on the flour. Flip it over and use your hands (always clean) to brush off the excess flour and spread it around on that side. Take your rolling pin, jar or wine bottle and gently press down as you roll from the center out to the edges, occasionally rolling along the edges so the splits in the dough are filled in. After it has increased in diameter by a few inches, flip it over, spreading the flour out again on the work surface or adding more. Roll again until the dough forms a rough 12-inch circle or is about 1/8-inch thick.
- Roll up the dough onto your rolling pin (or other device) or drape it over, to transfer to your baking sheet. You can also make this in a pie pan if you have one.
- Fill with your favorite filling, leaving about 2 inches of uncovered dough around the edges. Turn the edges up and over the filling, pinching any openings in the dough together, to prevent the filling juices from leaking out. Bake according to your pie recipe.
Passive Time includes 30 minutes minimum to chill, plus 5 minutes to roll out.
VARIATION:
Pie crust made in a food processor:
- Place the flour, salt and sugar into the bowl of a food processor and pulse briefly to mix.
- Cut butter into 1/4-inch thick slices and scatter around the bowl. Pulse about 6-8 times for a few seconds each time, until the butter is in pea-size pieces. Drizzle the ice water into the flour mixture as you pulse the processor, until it forms into a ball. Don’t overdo it! Stop as soon as it is mostly in a ball. Continue with step 6 above.


This is an easy trick for people who don’t think making pie crust is easy!